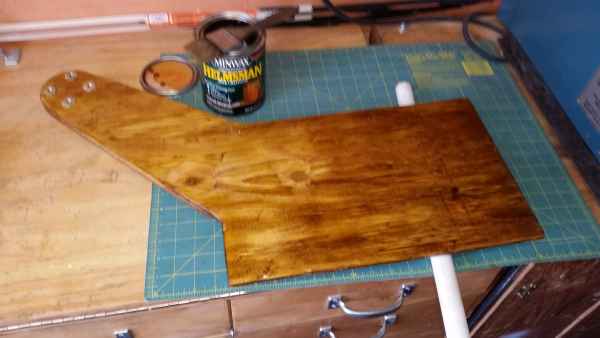
I am currently finishing up a project where I am varnishing a small computer table that swings out over the Co-Pilot’s chair in our motor home.Computer Table Project I have decided to give it a three layer marine spar varnish treatment. When you paint it is tempting to wrap the brush in plastic wrap and put it in the refrigerator. Now I may look dumb, but I know better than to place a smelly brush in mama’s refrigerator. That means I must clean the brush after each use. The alternative is to buy cheap brushes and toss them. Right! But you see I am already using cheap brushes. I like a simple two inch pig bristle brush that costs under $2 at the hardware store. Let’s see, that is three coats times two sides, or six brushes, which adds up to nearly $12, almost as much as the quart of spar varnish.
The alternatives are, 1.The refrigerator – we already covered that: 2. Place the brush in a jar of thinner – Wrong… the bristles take a set and the brush is unusable. 3. Carefully suspend the brush in a jar of thinner… better, but invariably I manage to tip the whole thing over and create a smelly mess.
No, better to just own the problem and clean the brush after each use. I propose that you can clean a two inch brush a dozen times with less than a pint of thinner. This procedure will get the brush quite clean and flexible and ready for its next use.
Let’s call this the “Five Stage Counter-Current Brush Washing Procedure:”
Supplies:
1 quart of paint thinner.
2 extra empty quart thinner cans.
1 empty quart sized plastic motor oil bottle.
1 soft rag the size of a tee shirt.
1. Cut the bottom two inches off the motor oil bottle and discard the top piece. Wipe the oil out with a corner of your rag.
2. When you finish flowing that last brush stroke of varnish onto the work piece, find a scrap of wood or cardboard and paint the last of the varnish out of the brush until it is quite dry.
3. This first use of the system doesn’t count for it just sets up the counter-current washing cycle.
4. The basic wash cycle:
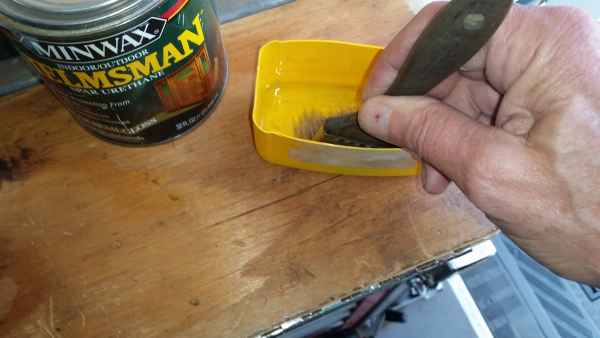
a. Pour a little of the thinner into the wash tray, the “oil bottle bottom,” until the ridge in the center us just under the liquid. It takes about one ounce of thinner.
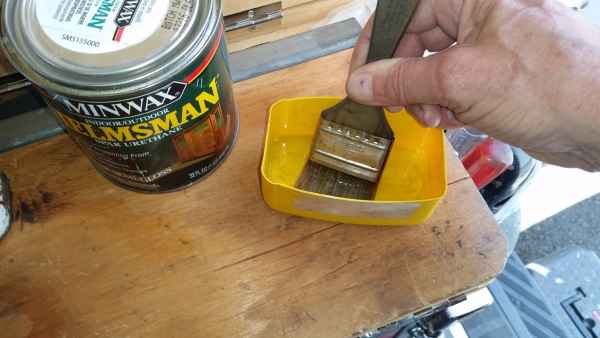
b. Scrub the brush back and forth over the center ridge giving the bristles a good flexing with each stroke. You should see the solvent gushing through the bristles.
c. Scrape the excess liquid from the bristles on the edge of the wash tray.
d. Dry the bristles with the rag.
e. Drape the rag over your extended index finger and flip the bristles against your covered finger to drive out the last of the solvent.
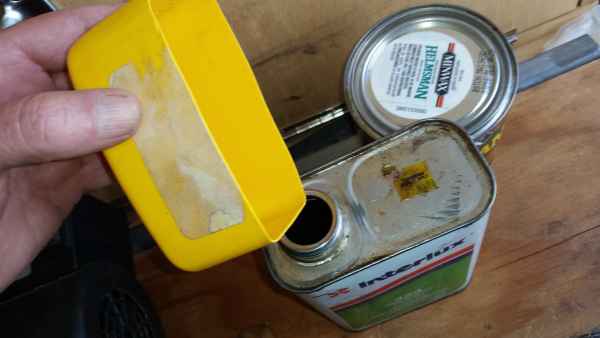
f. Where you pour the used solvent is what makes this counter-current.
5. Mark one empty thinner can “Dirty Solvent”
6. Mark the second empty thinner can “Soiled Solvent.”
7. For the first brush washing simply pour the first two washings into the “Dirty Solvent” can, and the third and fourth washings into the “Soiled Solvent” can. This then is four washings in clean solvent and will use four ounces of solvent. (12 brushes would be 48 ounces of solvent, but we can do better than that.)
8. For all subsequent washings use this sequence:
a. WASH 1: From the “Dirty Solvent” can pour enough thinner to barely cover the center ridge, and follow the basic wash cycle, (Step 4.)
b. Discard this wash solvent. I pour it out onto a newspaper or grungy rag and let it evaporate in a safe place.
c. This is the only purge from the system and will be the dirtiest solvent mixed with the most paint.
d. WASH 2: Again from “Dirty Solvent” can pour the rest of the thinner in your wash tray and follow the basic wash cycle, (Step 4.)
e. Return this solvent to the “Dirty Solvent” can.Easy to Pour
f. WASH 3: Now from the “Soiled Solvent” can pour enough thinner to just cover the center ridge, and follow the basic wash cycle, (Step 4.)
g. Pour this solvent into the “Dirty Solvent” can.
h. WASH 4: Again from the “Soiled Solvent” can pour the rest of the solvent in the wash tray and follow the basic wash cycle, Step 4.)
i. Return this thinner to the “Soiled Solvent” can.
j. WASH 5: Now pour enough clean thinner in the wash tray to cover the center ridge and once again follow the basic wash cycle. (Step 4.)
k. Pour this nearly clean thinner in the “Soiled Solvent” can. This is the only clean solvent you use, about one ounce per brush.
The beauty of this system is you only toss an ounce of the dirtiest thinner, the one with everything you couldn’t paint out. You only use an ounce of clean thinner, and your brush will always be clean soft and flexible. This is great for varnish, because the brush looks clean long before it really is clean. I can tell you from personal experience that it is difficult to flow on the next coat of varnish with a brush that is like a spatula.
And yes this is not true counter current washing, there is some back mixing, and yes by having another can in you inventory you could do the same cleanliness with four stages of pure counter current washing. The Finished Product